flutter_globe_3d 2.2.5  flutter_globe_3d: ^2.2.5 copied to clipboard
High-performance Flutter widget that renders an interactive 3D Earth globe using GPU fragment shaders; supports markers, connections and smooth gestures.
Flutter Globe 3D #

![]()
🚀 A high-performance 3D globe widget for Flutter, rendered with GPU Fragment Shaders for smooth interactions, markers, and connections.
English / 中文 #
✨ Demos & Screenshots #
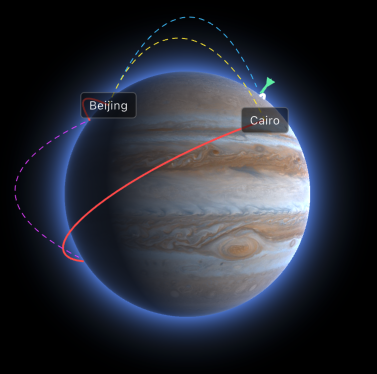 Jupiter Texture |
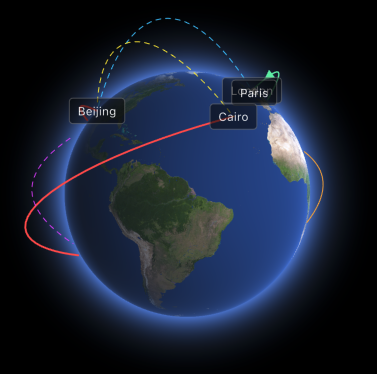 Earth Texture |
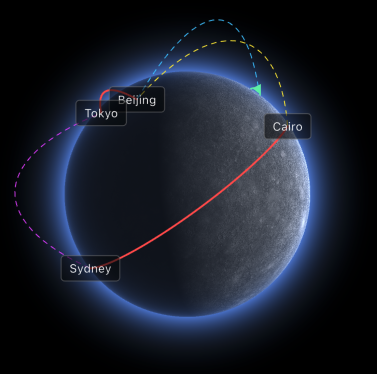 Moon Texture |
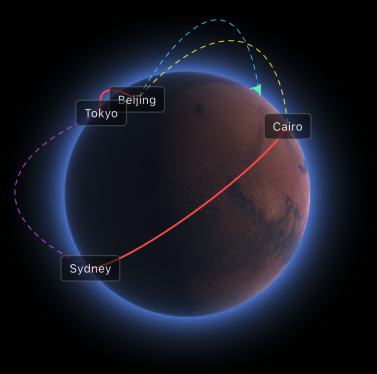 Mars Texture |
 Earth Animation |
|
English #
🌟 Features (v2.2.3) #
- High-Performance: Renders the globe on the GPU using Fragment Shaders, ensuring high frame rates (60-120FPS) and minimal CPU load.
- Advanced Lighting: Supports
RealTime(day/night cycle),FollowCamera, andFixedCoordinateslight modes. - Precise Control: Programmatically focus the camera on specific coordinates (Latitude/Longitude).
- Stable & Adaptive: A robust architecture that works seamlessly within dynamic layouts like
ListViewandStack. - Controller-Driven: All state, including rotation, zoom, markers, and connections, is managed through a unified
EarthController. - Customizable: Easily swap textures to display different celestial bodies like the Moon, Mars, or Jupiter.
🛠️ Usage Guide #
1. Installation
Add the dependency to your pubspec.yaml and declare your texture assets.
dependencies:
  flutter_globe_3d: ^2.2.3

flutter:
  assets:
    # Declare your custom texture image
    - assets/your_earth_texture.png
Note: The shader file is managed internally by the package and does not need to be declared.
2. Basic Setup
The main widget is Earth3D. Create an EarthController to manage its state.
import 'package:flutter/material.dart';
import 'package:flutter_globe_3d/flutter_globe_3d.dart';

class GlobeDemo extends StatefulWidget {
  @override
  State<GlobeDemo> createState() => _GlobeDemoState();
}

class _GlobeDemoState extends State<GlobeDemo> {
  // 1. Initialize the controller
  late final EarthController controller;

  @override
  void initState() {
    super.initState();
    controller = EarthController();
  }

  @override
  void dispose() {
    controller.dispose();
    super.dispose();
  }

  @override
  Widget build(BuildContext context) {
    return Center(
      child: Earth3D(
        controller: controller,
        // 2. Load your texture
        texture: const AssetImage('assets/your_earth_texture.png'),
        initialScale: 0.8, // Initial scale of the globe
      ),
    );
  }
}
3. Lighting & Camera Control (New in v2.2.3)
You can now control the lighting mode and programmatically focus the camera.
// Set light mode to RealTime (simulates sun position based on UTC time)
controller.setLightMode(EarthLightMode.realTime);

// Or set a fixed light source
controller.setLightMode(EarthLightMode.fixedCoordinates);
controller.setFixedLightCoordinates(30.0, 120.0); // Lat, Lon

// Focus camera on a specific location (e.g., Tokyo)
controller.setCameraFocus(35.6895, 139.6917);
4. Adding Markers (Nodes)
Define markers with EarthNode and add them using the controller.
// Add in initState() or after the controller is initialized
controller.addNode(
  EarthNode(
    id: 'tokyo',
    latitude: 35.6895,
    longitude: 139.6917,
    // Any widget can be used as a marker
    child: const Icon(Icons.pin_drop, color: Colors.yellow, size: 24),
  ),
);
5. Adding Connections
Use EarthConnection to link two existing nodes by their IDs. Connections are rendered as 3D arcs with occlusion culling.
// Example: connecting Tokyo and London
controller.connect(
  EarthConnection(
    fromId: 'tokyo',
    toId: 'london', // Assumes a node with ID 'london' exists
    color: Colors.cyanAccent,
    width: 2.0,
    isDashed: true, // Animate with a dashed line
    showArrow: true, // Show direction arrow
  ),
);
6. Controller API
The EarthController allows you to dynamically control the globe's behavior.
| Property/Method | Type | Description |
|---|---|---|
enableAutoRotate |
bool |
Toggles continuous horizontal rotation. |
rotateSpeed |
double |
Sets the auto-rotation speed (positive for right). |
lockNorthSouth |
bool |
Locks vertical rotation (pitch), preventing polar tilt. |
lockZoom |
bool |
Disables all zoom interactions. |
setZoom(z) |
void |
Programmatically sets the zoom level. |
setOffset(o) |
void |
Programmatically sets the rotation offset (simulates drag). |
setCameraFocus(lat, lon) |
void |
(New) Focuses the camera on specific coordinates. |
setLightMode(mode) |
void |
(New) Sets lighting mode (realTime, followCamera, fixed). |
setFixedLightCoordinates |
void |
(New) Sets light position for fixedCoordinates mode. |
addNode(node) |
void |
Adds a new marker node to the globe. |
connect(conn) |
void |
Adds a new connection line between two nodes. |
中文 (简体) #
🌟 核心特点 (v2.2.3) #
- 高性能渲染: 基于 GPU Fragment Shader 直接渲染,极大减少 CPU 开销,确保高帧率(60–120FPS)下的流畅交互。
- 高级光照系统: 支持
RealTime(实时日照)、FollowCamera(跟随相机) 和FixedCoordinates(固定坐标) 三种光照模式。 - 精准相机控制: 支持编程式聚焦到指定的经纬度坐标。
- 稳定自适应: 架构稳定,已修复所有已知布局和渲染问题,完美适应各类动态布局(如
ListView,Stack)。 - 控制器驱动: 所有状态(旋转、缩放、标记、连线)均由
EarthController统一管理,逻辑清晰。 - 高度可定制: 可轻松更换纹理,用于展示不同的星球(如月球、木星等)。
🛠️ 快速上手 #
1. 安装与配置
在 pubspec.yaml 中添加依赖,并声明自定义纹理图片。
dependencies:
  flutter_globe_3d: ^2.2.3

flutter:
  assets:
    # 确保你的自定义纹理图片已声明
    - assets/your_earth_texture.png
注意: Shader 文件由包内部管理,无需再次声明。
2. 基础使用
主组件为 Earth3D。您需要创建一个 EarthController 来控制和管理地球的状态。
import 'package:flutter/material.dart';
import 'package:flutter_globe_3d/flutter_globe_3d.dart';

class GlobeDemo extends StatefulWidget {
  @override
  State<GlobeDemo> createState() => _GlobeDemoState();
}

class _GlobeDemoState extends State<GlobeDemo> {
  // 1. 初始化控制器
  late final EarthController controller;

  @override
  void initState() {
    super.initState();
    controller = EarthController();
  }

  @override
  void dispose() {
    controller.dispose();
    super.dispose();
  }

  @override
  Widget build(BuildContext context) {
    return Center(
      child: Earth3D(
        controller: controller,
        // 2. 使用你的纹理图片
        texture: const AssetImage('assets/your_earth_texture.png'),
        initialScale: 0.8, // 地球在容器中的初始缩放比例
      ),
    );
  }
}
3. 光照与相机控制 (v2.2.3 新增)
您现在可以控制光照模式,并以编程方式将相机聚焦到特定位置。
// 设置光照模式为实时 (根据 UTC 时间模拟太阳位置)
controller.setLightMode(EarthLightMode.realTime);

// 或者设置固定光源
controller.setLightMode(EarthLightMode.fixedCoordinates);
controller.setFixedLightCoordinates(30.0, 120.0); // 纬度, 经度

// 将相机聚焦到特定位置 (例如: 东京)
controller.setCameraFocus(35.6895, 139.6917);
4. 添加标记点 (Nodes)
通过 EarthNode 定义标记点,并使用 controller.addNode() 方法添加到地球上。
// 在 initState() 或控制器初始化后调用
controller.addNode(
  EarthNode(
    id: 'shanghai',
    latitude: 31.2304,   // 纬度
    longitude: 121.4737, // 经度
    // 标记点的自定义 Widget
    child: const Icon(Icons.pin_drop, color: Colors.yellow, size: 24),
  ),
);
5. 添加连线 (Connections)
使用 EarthConnection 连接两个已存在的 EarthNode 的 ID。连线默认呈 3D 拱形,并进行遮挡剔除。
// 连线示例:连接上海和纽约
controller.connect(
  EarthConnection(
    fromId: 'shanghai',
    toId: 'new_york', // 假设已有一个 ID 为 'new_york' 的节点
    color: Colors.cyanAccent,
    width: 2.0,
    isDashed: true,   // 启用虚线动画
    showArrow: true,  // 显示箭头方向
  ),
);
6. 控制器 API 参考
EarthController 是控制地球行为的核心,您可以通过修改其属性实现自定义交互和动画。
| 属性/方法 | 类型 | 描述 |
|---|---|---|
enableAutoRotate |
bool |
是否开启自动水平旋转。 |
rotateSpeed |
double |
自动旋转速度(正值向右,负值向左)。 |
lockNorthSouth |
bool |
锁定南北方向旋转(禁止上下倾斜)。 |
lockZoom |
bool |
锁定缩放功能。 |
setZoom(z) |
void |
编程式设置缩放级别。 |
setOffset(o) |
void |
编程式设置旋转偏移量(相当于手动拖动)。 |
setCameraFocus(lat, lon) |
void |
(新增) 将相机聚焦到指定的经纬度。 |
setLightMode(mode) |
void |
(新增) 设置光照模式 (realTime, followCamera, fixed)。 |
setFixedLightCoordinates |
void |
(新增) 设置 fixedCoordinates 模式下的光源位置。 |
addNode(node) |
void |
添加新的标记点。 |
connect(conn) |
void |
添加新的连线。 |
🤝 Contributing #
Contributions are welcome! Feel free to submit Issues or Pull Requests to help improve the project.
📄 License #
This project is licensed under the MIT License - see the LICENSE file for details.
📧 Contact #
For support or questions, please open an issue at: https://github.com/XiaoNaoWeiSuo/flutter_globe_3d/issues
Metadata

Publisher
Weekly Downloads
Metadata
High-performance Flutter widget that renders an interactive 3D Earth globe using GPU fragment shaders; supports markers, connections and smooth gestures.
Repository (GitHub)
View/report issues
Documentation
License
![]() MIT (license)
MIT (license)